Vue3
Vue3
1.Vue简介
1.Vue的特点
- 采用 组件化 模式,提高代码复用率、且让代码更好维护。
- 声明式 编码,让编码人员无需直接操作Dom,提高开发效率。
- 使用 虚拟Dom +优秀的 Diff算法 ,尽量复用Dom节点。
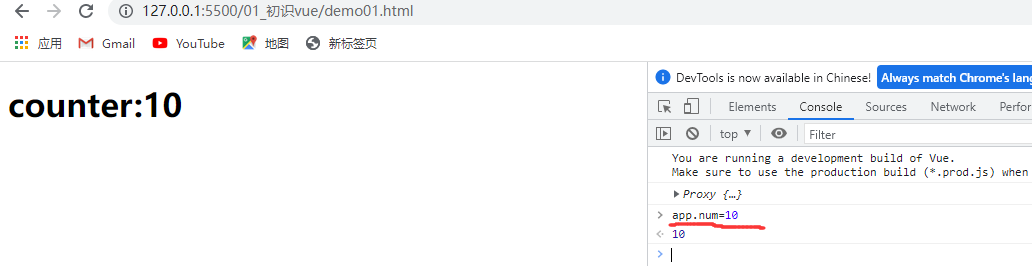
2.入门案例
 <!DOCTYPE html>

<html lang="en">

<head>

    <meta charset="UTF-8">

    <meta http-equiv="X-UA-Compatible" content="IE=edge">

    <meta name="viewport" content="width=device-width, initial-scale=1.0">

    <title>Document</title>

    <script src="../js/vue3.js"></script>

</head>

<body>

    <div id="counter">

        <h1> counter:{{ num }}</h1>

    </div>


    <script>

        // const Counter={

        //     data(){

        //         return{

        //             num:0

        //         }

        //     }

        // }


        const Counter={

            data:function(){

                return {

                    num:0

                }

            }

        }

        //创建一个应用,将配置的对象counter的内容渲染到选择器#counter的元素上

        let app = Vue.createApp(Counter).mount("#counter")

        console.log(app)

    </script>

</body>

</html>
可以用 app.num = 10修改值
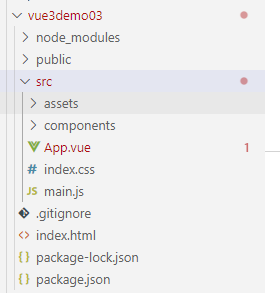
2.用 Vite 来创建一个vue项目
使用 npm:(在控制台终端输入)
 npm init vite-app vue3demo03  //vue3demo03 项目名称

cd vue3demo03

npm install

npm run dev

最新创建步骤

# npm 6.x

$ npm init vite@latest <project-name> --template vue


# npm 7+,需要加上额外的双短横线

$ npm init vite@latest <project-name> -- --template vue


$ cd <project-name>

$ npm install

$ npm run dev
创建好后生成:
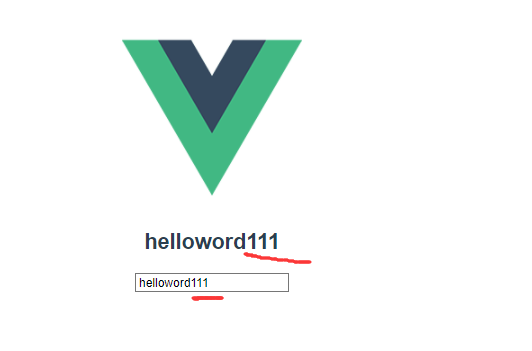
3.Vue声明式语法与数据双向绑定(v-model)
App.vue
<template>
<img alt="Vue logo" src="./assets/logo.png" />
<!-- <HelloWorld msg="Hello Vue 3.0 + Vite" /> -->
<h2 @click="changeMsg"> {{msg}}</h2>
<!-- v-model来进行绑定 -->
<input type="text" v-model="msg" />
</template>
<script>
import HelloWorld from './components/HelloWorld.vue'
//命令式
//document.querySelector("h1").innerHTML="helloworld"
//声明式
export default {
name: 'App',
// components: {
// HelloWorld
// }
data(){
return{
msg:"helloword"
}
},
methods:{
changeMsg(){
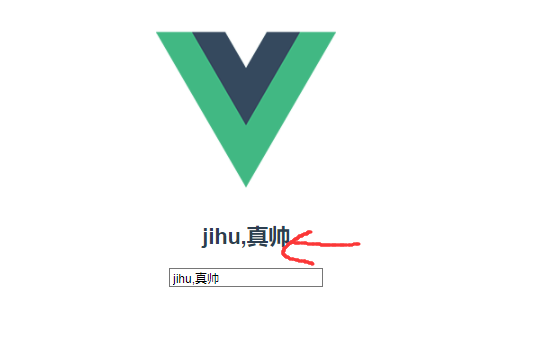
this.msg = "jihu,真帅"
}
}
}
</script> 运行结果:
改变输入框的值,上面的值就会改变,这就是双向绑定
单击后,会改变值
4.模板语法常用指令
插值
1.文本 (v-once指令)
数据绑定最常见的形式就是使用“Mustache” (双大括号) 语法的文本插值:
<span>Message: {{ msg }}</span> Mustache 标签将会被替代为对应组件实例中
msgmsg通过使用 v-once 指令 ,你也能执行一次性地插值,当数据改变时,插值处的内容不会更新。但请留心这会影响到该节点上的其它数据绑定:
<span v-once>这个将不会改变: {{ msg }}</span> <template>
<img alt="Vue logo" src="./assets/logo.png" />
<!--双括号语法 Mustache -->
<h2 >{{msg}}</h2>
<!-- v-once指令,使得内容只渲染一次 -->
<h2 @click="changeMsg" v-once> {{msg}}</h2>
</template>
<script>
import HelloWorld from './components/HelloWorld.vue'
//声明式
export default {
name: 'App',
data(){
return{
msg:"helloword"
}
},
methods:{
changeMsg(){
this.msg = "jihu,真帅"
}
}
}
</script> 2.原始 HTML Attribute (v-html指令 、v-bind指令)
 <template>

  <img alt="Vue logo" src="./assets/logo.png" />

  <!-- <HelloWorld msg="Hello Vue 3.0 + Vite" /> -->

  <!--双括号语法 Mustache -->

  <h2 >{{msg}}</h2>

  <!-- v-once指令,使得内容只渲染一次 -->

  <h2 @click="changeMsg" v-once> {{msg}}</h2>


  <!-- v-html指令,使得内容插入html的代码 -->

<div>{{content}}</div>

<div v-html="content"></div>


<!-- v-bind指令,绑定属性的内容 -->

<div :id="id" :class="id"></div>

<div v-bind:id="id" v-bind:class="id"></div>


</template>

<script>

import HelloWorld from './components/HelloWorld.vue'

//声明式

export default {

  name: 'App',

  data(){

    return{

      msg:"helloword",

      content:"<h1>标题1</h1><h2 style='color:red'>标题2</h2>",

      id:"d1"

    }

  },

  methods:{

    changeMsg(){

    this.msg = "jihu,真帅",

    this.id= "d2"


    }

  }


}

</script>


<style >

  #d1{

    width: 100px;

    height: 100px;

    background: red;

  }

  #d2{

    width: 100px;

    height: 100px;

    background: green;

  }

</style>
展示结果:

点击helloword后:

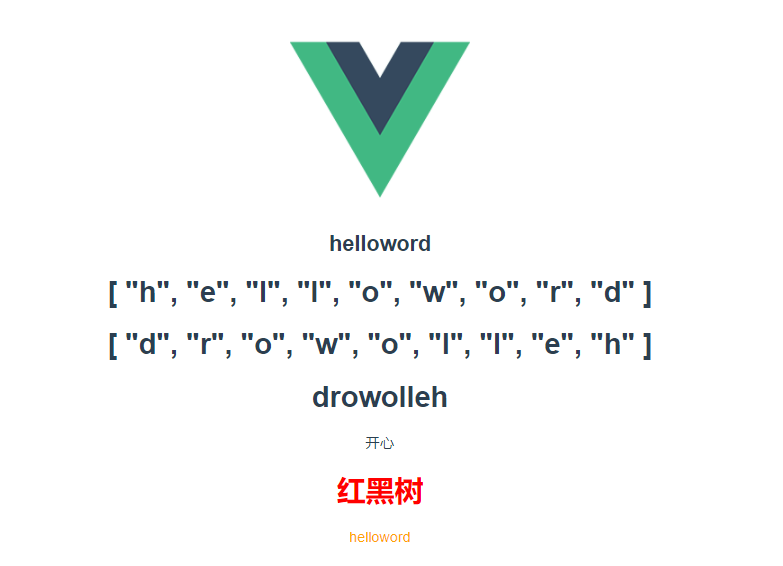
3.使用 JavaScript 表达式
 <template>

  <img alt="Vue logo" src="./assets/logo.png" />

  <h2 >{{msg}}</h2>

  <!-- javascript表达式可以在模板语法里使用 -->

<h1>{{msg.split('')}}</h1>

<h1> {{ msg.split('').reverse() }}</h1>

<h1>{{msg.split('').reverse().join('')}}</h1>

<div v-bind:id="msg.split('').reverse().join('')" v-bind:class="id"></div>

<div>{{color=='绿色'?'开心':'难过'}}</div>


<div v-html="content" ></div>

<div :id="color1">{{msg}}</div>


</template>


<script>

//声明式

export default {

  name: 'App',

  data(){

    return{

      msg:"helloword",

      color:'绿色',

      color1:'color',

      content:"<h1 style='color:red'>红黑树</h1>"

    }

  }


}

</script>


<style >

#color{

color: orange;

}

</style>
展示结果:
动态指令
<template>
<!-- 动态指令 -->
<div v-bind:[attributeName]="d1"></div>
<button @click="changeName">点击 切换颜色</button>
<button @[eventName]="changeName">点击切换颜色</button>
</template>
<script>
//声明式
export default {
name: 'App',
data(){
return{
attributeName:'class',
d1:'color',
eventName:'click'
}
},
methods:{
changeName:function(){
this.attributeName='id'
}
}
}
</script>
<style >
#color{
width: 100px;
height:100px;
background: yellow;
}
.color{
width: 100px;
height:100px;
background: blue;
}
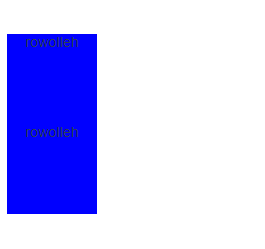
</style> 5.计算属性和监听器
1.计算属性
 <template>

  <!-- 计算属性  -->

<div  class="d1">{{msg.split('').reverse().join('')}}</div>

<div  class="d1">{{reverseMsg}}</div>


</template>


<script>

//声明式

export default {

  name: 'App',

  data(){

    return{

      msg:'helloworld'


    }

  },

  computed:{

    reverseMsg:function(){

     return  this.msg.split('').reverse().join('')

    }

  }


 }

}

</script>


<style >

.d1{

 width: 100px;

  height:100px;

  background: blue;

}

</style>
展示结果:
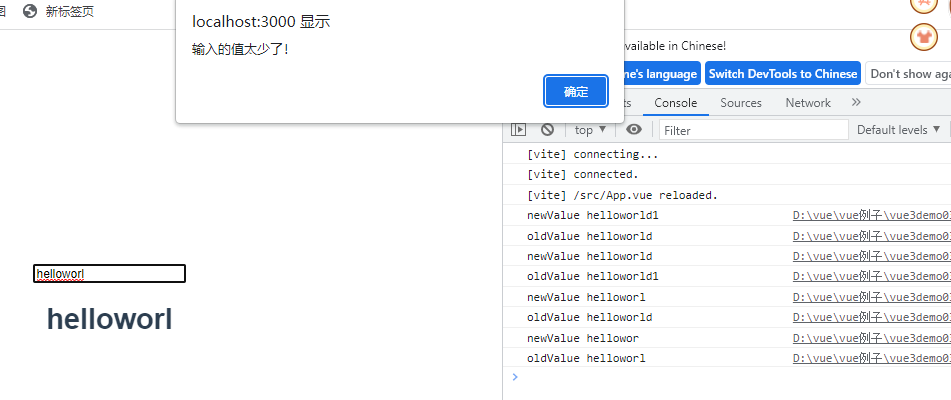
2.监听器 (监听数据的变化)
 <template>

  <!-- 计算属性  -->

<div  class="d1">{{msg.split('').reverse().join('')}}</div>

<div  class="d1">{{reverseMsg}}</div>


<!-- 监听 -->

<input type="text" v-model="msg" />

<h1>{{msg}}</h1>


</template>


<script>

//声明式

export default {

  name: 'App',

  data(){

    return{

      msg:'helloworld'

    }

  },

  computed:{

    reverseMsg:function(){

     return  this.msg.split('').reverse().join('')

    }

  },

  watch:{

    //监听值的变化

    msg:function(newValue,oldValue){

      console.log('newValue',newValue)

      console.log('oldValue',oldValue)

      if(newValue.length<10){

        alert("输入的值太少了!")

      }


    }

  }


}

</script>


<style >

#id{

  width: 100px;

  height:100px;

  background: yellow;

}

.d1{

 width: 100px;

  height:100px;

  background: blue;

}

</style>
展示结果
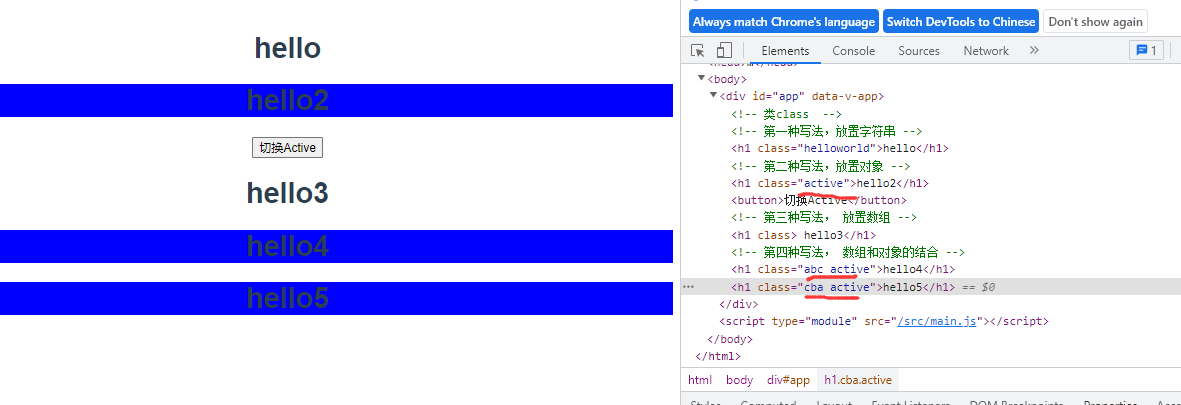
6.Class与Style绑定
1.Class类名的多种操作方式
 <template>

  <!-- 类class  -->

  <!-- 第一种写法,放置字符串 -->

<h1 :class="msg">hello</h1>

<!-- 第二种写法,放置对象 -->

<h1 :class="{active:isActive}" >hello2</h1>

<button @click="tochangeActive">切换Active</button>

<!-- 第三种写法, 放置数组 -->

<h1 :class="attr"> hello3</h1>

<!-- 第四种写法, 数组和对象的结合 -->

<h1 :class="['abc',{active:true}]">hello4</h1>

<h1 :class="[classname,{active:isActive}]">hello5</h1>


</template>


<script>

//声明式

export default {

  name: 'App',

  data(){

    return{

      msg:'helloworld',

      isActive:true,

      attr:['swiper','active'],

      classname:'abc'

    }

  },

methods:{

  tochangeActive:function(){

    this.isActive = !this.isActive,

    this.attr.pop(), //pop() 用来删除attr:['swiper','active']中的值,一次删一个,从后往前删

    this.classname='cba'

  }

}

}

</script>


<style >

.active{

  background: blue;

}

</style>
输出结果:
2.Style样式的多种操作方式
 <template>

  <!-- style  -->

  <!-- 第一种写法,放置字符串 -->

<h1 :style="msg">hello</h1>

<!-- 第二种写法,放置对象 -->

<h1 :style="{background:'purple'}" >hello2</h1>

<button @click="tochangeActive">切换Active</button>

<!-- 第三种写法, 放置数组 -->

<h1 :style="styleObj"> hello3</h1>

<!-- 第四种写法, 数组和对象的结合 -->

<h1 :style="[styleObj,{width:'500px'}]">hello4</h1>


</template>

<script>

//声明式

export default {

  name: 'App',

  data(){

    return{

      msg:"background:yellow;",

      isActive:true,

      styleObj:{

        //如果遇到需要多个单词组成的样式,可以使用引号   例如:'background-color':'pink'

        //也可以使用驼峰命名法  例如: backgroundColor:'pink',


        background:'pink',

        border:'1px solid orange',

        boxSizing:"border-box"

      }

    }

  },

methods:{

  tochangeActive:function(){

    this.styleObj.backgroundColor='skyBlue'


  }

}

}

</script>

<style >

.active{

  background: blue;

}

</style>
展示效果

点击后

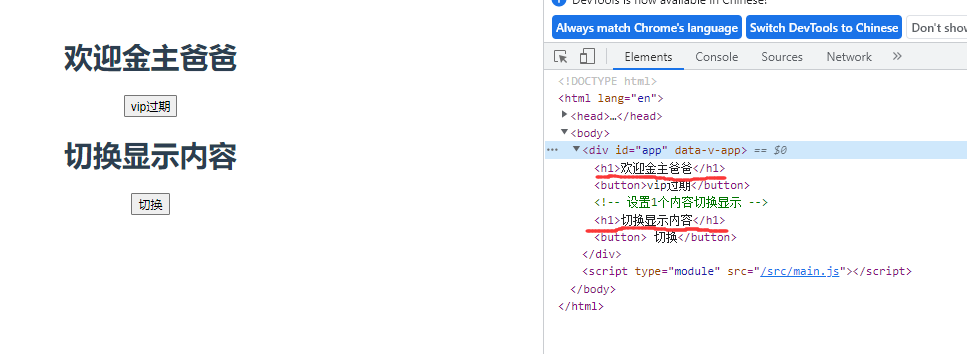
7.条件渲染 v-if 与v-show
<template>
<h1 v-if="user=='超级vip'" >欢迎金主爸爸</h1>
<h1 v-else-if="user=='vip'">欢迎会员登录</h1>
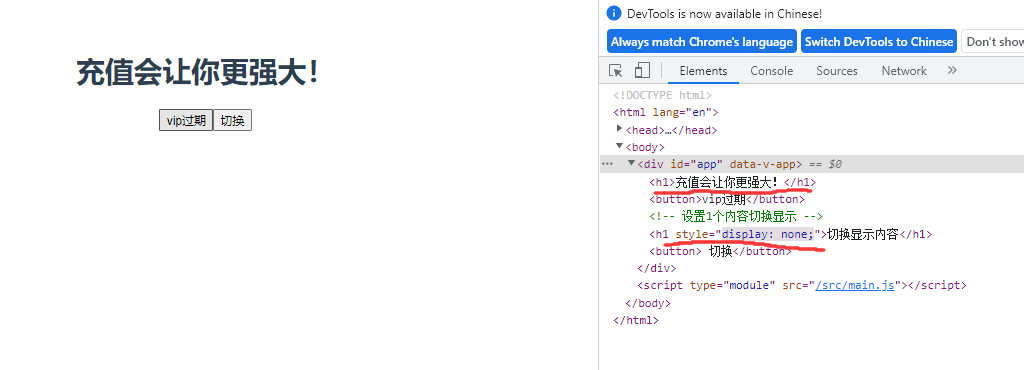
<h1 v-else>充值会让你更强大!</h1>
<button @click="changhestatus">vip过期</button>
<!-- 设置1个内容切换显示 -->
<h1 v-show="isShow">切换显示内容</h1>
<button @click="toggleShow"> 切换</button>
</template>
<script>
//声明式
export default {
name: 'App',
data(){
return{
user:'超级vip',
isShow:true
}
},
methods:{
changhestatus:function(){
this.user='普通用户'
},
toggleShow:function(){
this.isShow = !this.isShow
}
}
} 展示结果:
点击按钮后:
总结:
vs v-ifv-show
v-if
v-if相比之下,
v-show一般来说 ,
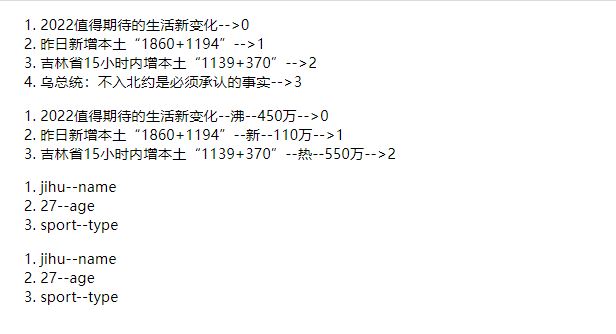
v-ifv-showv-showv-if8.列表渲染 v-for
 <template>

<div>

  <ol>

    <!-- item是里面一行一行的字符串 , i是它的索引值 -->

    <!-- :key="i" 相当于给每个班级做上标号  不写也行 -->

    <li v-for="(item,i) in news" :key="i">{{item}}-->{{i}}</li>

  </ol>


  <ol>

    <li v-for="(item,i) in news1"  :key="i">{{ item.title }}--{{item.tag}}--{{item.num}}-->{{i}}</li>

  </ol>

<!-- item 是值,i相当于key -->

  <ol>

    <li v-for="(item,i) in jihu"  :key="i">{{item}}--{{i}}</li>

  </ol>

  <!-- of 和in的效果一样 -->

  <ol>

    <li v-for="(item,i) of jihu"  :key="i">{{item}}--{{i}}</li>

  </ol>


</div>


</template>


<script>

//声明式

export default {

  name: 'App',

  data(){

    return{

     news:[

       '2022值得期待的生活新变化',

       '昨日新增本土“1860+1194”',

       '吉林省15小时内增本土“1139+370”',

       '乌总统:不入北约是必须承认的事实'

     ],

     news1:[

       {

         title:'2022值得期待的生活新变化',

         tag:"沸",

         num:"450万"

       },

       {

         title:'昨日新增本土“1860+1194”',

         tag:"新",

         num:"110万"

       },

       {

         title:'吉林省15小时内增本土“1139+370”',

         tag:"热",

         num:"550万"

       }

     ],

     jihu:{

       name:'jihu',

       age:27,

       type:'sport'

     }

    }

  }

}

</script>
展示结果:
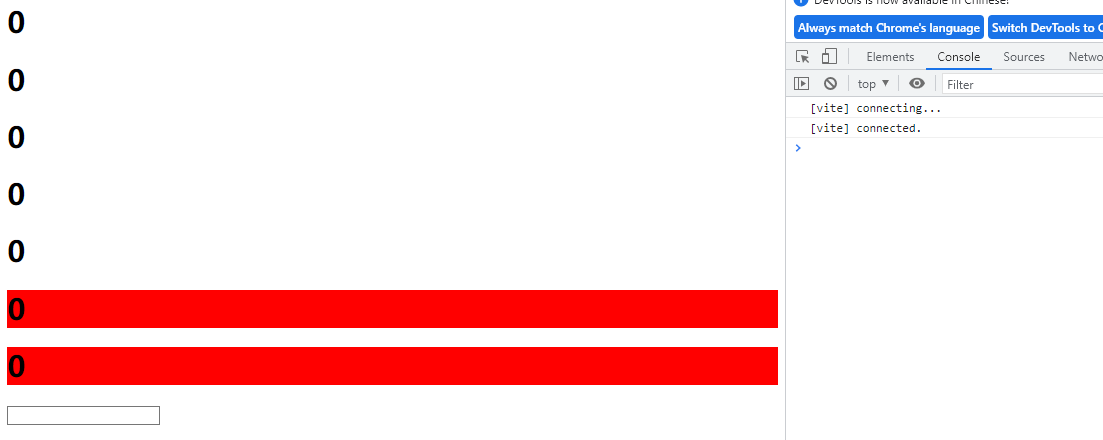
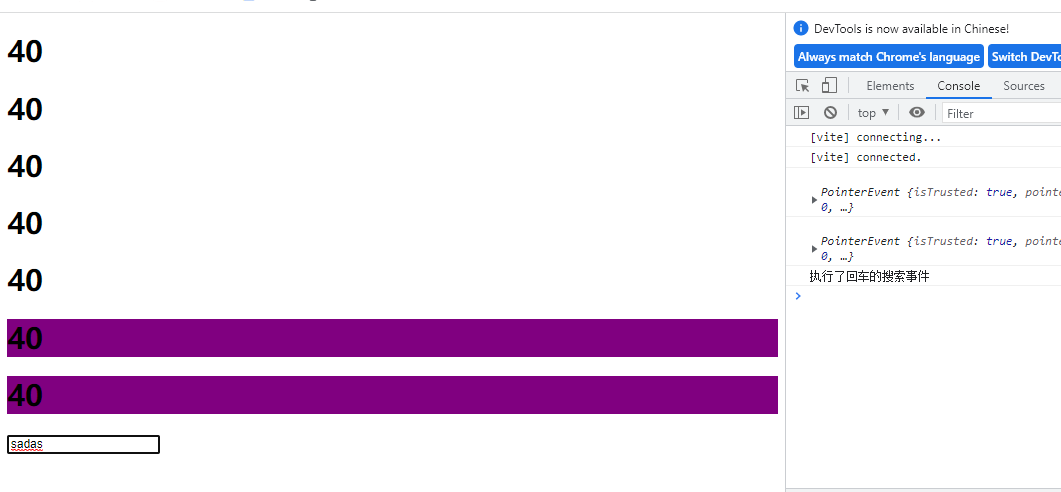
9.事件处理
我们可以使用
v-onv-on:click="methodName"@click="methodName"1.事件与参数和事件修饰符
 <template>

<div>

  <!-- 绑定事件,不需要参数 -->

 <h1 @click="changenumcount">{{num}}</h1>

 <!-- 绑定事件,直接处理表达式 -->

<h1 @click="num+=2">{{num}}</h1>

<!-- 绑定事件,传递参数 -->

<h1 @click="addNumEvent(10)">{{num}}</h1>

<!-- 绑定事件传递事件对象和参数 -->

<h1 @click="addNumEvent1(20,$event)">{{num}}</h1>

<!-- v-on是全称指令  ,@是缩写的指令 -->

<h1 v-on:click="addNumEvent1(20,$event)">{{num}}</h1>

<!-- 一个事件绑定多个处理函数 -->

<h1 :style="{background:color}" @click="addNumEvent1(20,$event),changeColor($event)">{{num}}</h1>


<!-- 事件的修饰符 -->

<!--

  常用的事件修饰:

   阻止事件冒泡.stop

   阻止默认事件.prevent

   事件只会触发一次.once

 -->

<h1 :style="{background:color}" @click.once="addNumEvent1(20,$event),changeColor($event)">{{num}}</h1>

<!--

  按键修饰符

     enter/tab/delete/esc/space/up/down/left/right

  系统修饰符:

     .ctrl/.alt/.shift/.meta

   鼠标按键的修饰符

    .left/.right/.middle

 -->

<input type="text" @keydown.enter="searchEvent" />


</div>


</template>


<script>

//声明式

export default {

  name: 'App',

  data(){

    return{

      num:0,

     color:'red'

    }

  },

  methods:{

    changenumcount:function(){

      this.num += 2;

      //this.num ++;

    },

    addNumEvent:function(number){

      console.log(number);

      this.num += number;

    },

    addNumEvent1:function(number,event){

      console.log(event);

      this.num += number;

    },

    changeColor:function(){

      this.color='purple';

    },

    searchEvent:function(){

      console.log("执行了回车的搜索事件")

    }


  }


}

</script>
展示结果
点击后
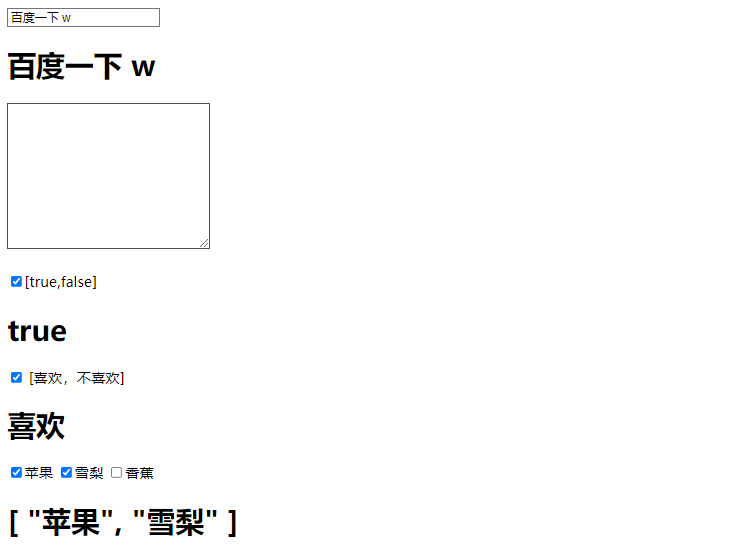
10.表单的输入绑定
基础用法
你可以用 v-model 指令在表单
<input><textarea><select>v-model1.表单的数据双向绑定 v-model与修饰符
<template>
<div>
<input v-model="searchKey" type="text" @keydown.enter="searchEvent" />
<h1>{{searchKey}}</h1>
<textarea v-model="lineText" name="textarea" id="" cols="30" rows="10"></textarea>
<h1>{{lineText}}</h1>
<!-- 表单获取的是是否选中内容 value值到时候会提交给后台-->
<input type="checkbox" name="like" v-model="checked" value="123">[true,false]
<h1>{{checked}}</h1>
<!--表单获取的是是否选中内容 -->
<input type="checkbox" name="like" v-model="checked1" true-value="喜欢" false-value="不喜欢"> [喜欢,不喜欢]
<h1>{{checked1}}</h1>
<!-- 复选框多个值的情况 -->
<input type="checkbox" name="likes" v-model="fruits" value="苹果">苹果
<input type="checkbox" name="likes" v-model="fruits" value="雪梨">雪梨
<input type="checkbox" name="likes" v-model="fruits" value="香蕉">香蕉
<h1>{{fruits}}</h1>
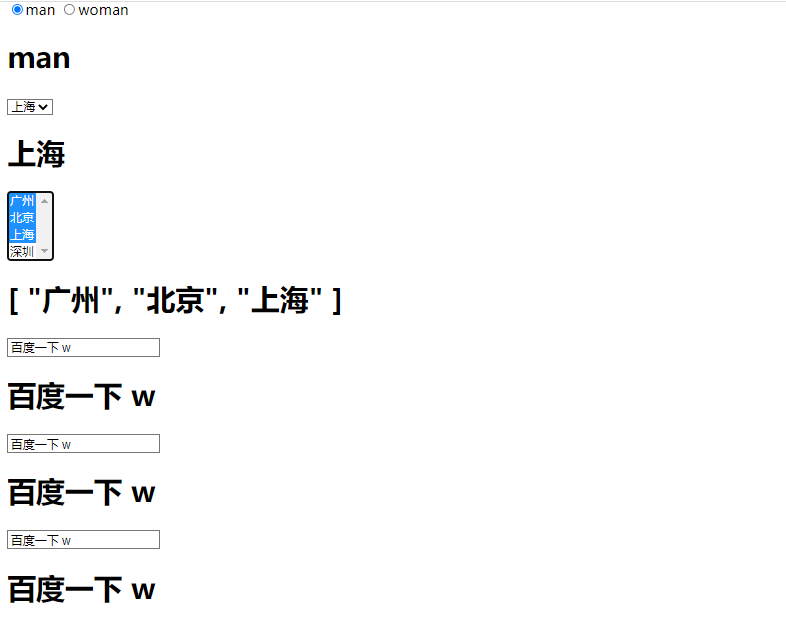
<!-- 单选框 -->
<input type="radio" name="sex" v-model="picked" value="man">man
<input type="radio" name="sex" v-model="picked" value="woman">woman
<h1>{{picked}}</h1>
<!-- 选项框 -->
<select name="city" v-model="city" >
<option value="广州">广州</option>
<option value="北京">北京</option>
<option value="上海">上海</option>
<option value="深圳">深圳</option>
</select>
<h1>{{city}}</h1>
<!-- 选项框 多选-->
<select name="city" v-model="cities" multiple>
<option value="广州">广州</option>
<option value="北京">北京</option>
<option value="上海">上海</option>
<option value="深圳">深圳</option>
</select>
<h1>{{cities}}</h1>
<!-- 修饰符 -->
<!-- .lazy/input变为change时间改变值 (当改变输入框的值时,searchkey的值不会自动跟着变化,只有回车 或点击外部才会改变)-->
<input v-model.lazy="searchKey" type="text" @keydown.enter="searchEvent" />
<h1>{{searchKey}}</h1>
<!-- number修饰符 转为数字 -->
<input v-model.lazy.number="searchKey" type="text" @keydown.enter="searchEvent" />
<h1>{{searchKey}}</h1>
<!-- trim修饰符 去掉空格 -->
<input v-model.trim="searchKey" type="text" @keydown.enter="searchEvent" />
<h1>{{searchKey}}</h1>
</div>
</template>
<script>
//声明式
export default {
name: 'App',
data(){
return{
searchKey:'百度一下',
lineText:"",
checked:false,
checked1:"",
fruits:[],
picked:"",
city:"",
cities:[]
}
},
methods:{
searchEvent:function(){
console.log("执行了回车的搜索事件"),
console.log(this.searchKey)
}
}
}
</script> 展示结果:
11.组件
1.组件与父组件传递数据给子组件方式props
 <template>

<div>

<Header></Header>

<Main></Main>

<Main></Main>

<Footer></Footer>

<!-- 通过props传递子组件数据 -->

<News :content="newsContent"></News>

<!-- <News :content="newsContent"  /> -->


</div>


</template>

<script>

//声明式

import Header from './components/Header.vue'

import Main from './components/Main.vue'

import Footer from './components/Footer.vue'

import News from './components/News.vue'

export default {

  name: 'App',

  data(){

    return{

     newsContent:'振兴中华1'

    }

  },

  methods:{

    searchEvent:function(){

      console.log("执行了回车的搜索事件"),

      console.log(this.searchKey)

    }

  },

  components:{

    Header, Main,Footer,News

  }

}

</script>
<!-- Header.vue -->
<template>
<div>
<h1>这是头部组件</h1>
</div>
</template>
<!--Footer.vue-->
<template>
<div>
<h1>这是Footer组件</h1>
</div>
</template>
<!-- Main.vue -->
<template>
<div>
<h1> {{msg}} 这是Main组件</h1>
</div>
</template>
<script>
export default {
data(){
return{
msg:' hello'
}
}
}
</script>
<!--News.vue-->
<template>
<div>
<h1>新闻内容是:{{content}}</h1>
</div>
</template>
<script>
export default {
props:['content']
}
</script> 2.通过自定义事件将子组件数据传递给父组件
 <!-- App.vue -->

<template>

<div>

<!-- 通过props传递子组件数据 -->

<News :content="newsContent" :msg1="msg"></News>

<!-- <News :content="newsContent"  /> -->


<!-- 子组件数据传递给父组件,自定义事件 -->

<Login @sendParentMsg="getChildMsg"></Login>

<h1>从子组件获取到的值: {{msg}}</h1>


</div>

</template>


<script>

//声明式

import News from './components/News.vue'

import Login from './components/Login.vue'

export default {

  name: 'App',

  data(){

    return{

     newsContent:'振兴中华1',

     msg:""

    }

  },

  methods:{

    getChildMsg(value){

      console.log(value);

      this.msg = value;

    }

  },

  components:{

    News,Login

  }

}

</script>
<!-- Login.vue -->
<template>
<div>
<input type="text" v-model="username">
<button @click="sendMsg">将数组提交给父组件</button>
</div>
</template>
<script>
export default {
data(){
return{
username:""
}
},
methods:{
sendMsg:function(){
//触发自定义事件, 语法: $emit(事件名称,发送的事件的参数)
this.$emit('sendParentMsg',this.username)
}
}
}
</script>
<!-- News.vue -->
<template>
<div>
<h1>新闻内容是:{{content}}</h1>
<h1>父组件获取到的数据,传递给子组件: {{msg1}}</h1>
</div>
</template>
<script>
export default {
props:['content','msg1']
}
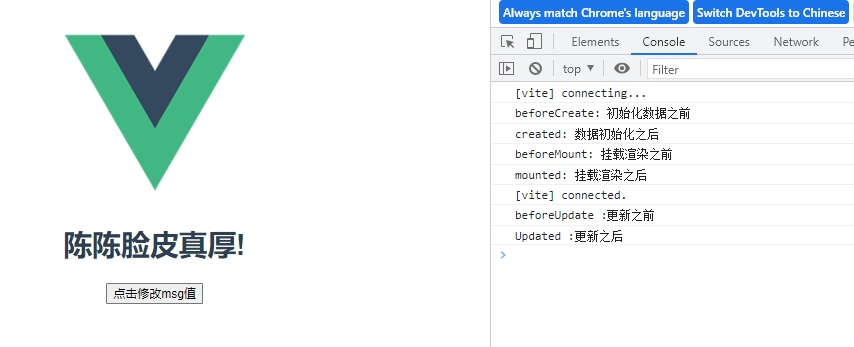
</script> 12.vue3声明周期函数
 <script setup>

// This starter template is using Vue 3 <script setup> SFCs

// Check out https://v3.vuejs.org/api/sfc-script-setup.html#sfc-script-setup

import HelloWorld from './components/HelloWorld.vue'

</script>


<template>

  <img alt="Vue logo" src="./assets/logo.png" />

  <!-- <HelloWorld msg="Hello Vue 3 + Vite" /> -->

  <h1 >{{msg}}</h1>

  <button @click="msg='陈陈脸皮真厚! '"> 点击修改msg值</button>


</template>


<script>

export default {

  data(){

    return{

      msg:'陈陈真帅!'

    }

  },

  components:{

    HelloWorld

  },

  beforeCreate(){

    console.log("beforeCreate: 初始化数据之前")

  },

 created(){

   console.log("created: 数据初始化之后")

 },

 beforeMount(){

   console.log("beforeMount: 挂载渲染之前")

 },

 mounted(){

   console.log("mounted: 挂载渲染之后")

 },

 beforeUpdate(){

   console.log("beforeUpdate :更新之前")

 },

 updated(){

   console.log("Updated :更新之后")

 },

 beforeUnmount(){

   console.log("beforeUnmount: 销毁之前")

 },

 unmounted(){

   console.log("unmounted: 销毁之后")

 }


}

</script>
展示结果:
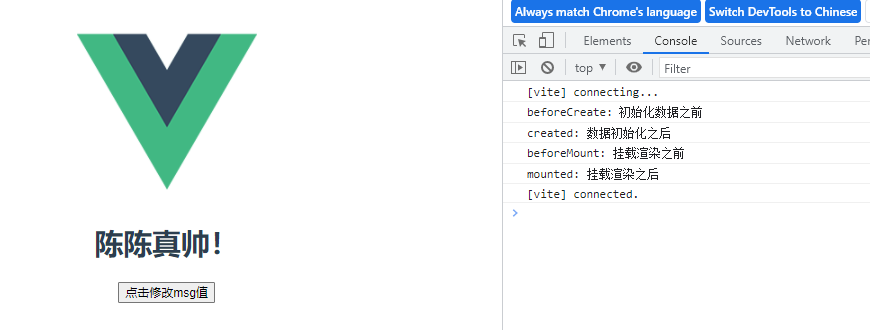
点击后
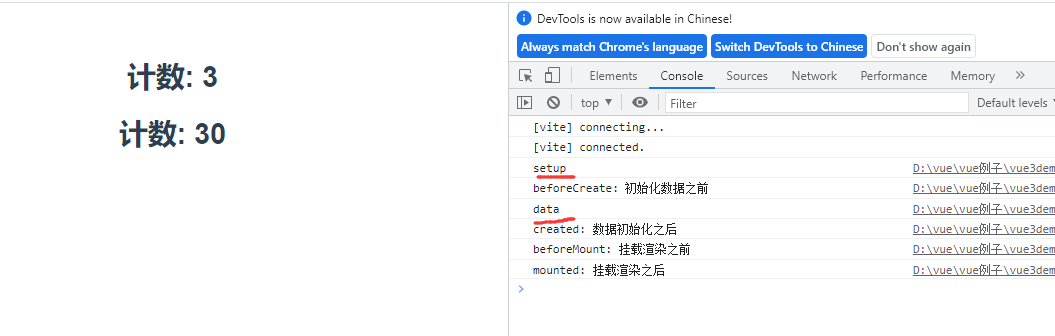
13.vue3合成API ( setup() )
1.vue3合成API初体验 --ref
 <template>

 <div>

<h1 @click="changeEvent">计数:  {{count}}</h1>

<h1 @click="changeNum">计数:  {{num}}</h1>

</div>

</template>


<script>

import {ref} from 'vue'

export default {

  name: 'App',

  data(){

    console.log('data')

    return{

      count:0

    }

  },

  methods:{

    changeEvent:function(){

      this.count++;

    }

  },

    //setup细节问题

    //setup是在beforeCreate生命周期回调之前就执行了,而且就执行一次,此时组件对象还没有创建,这时就不能使用this,this为undefined,不能通过this来访问data/computed/methods/props

    //其实所有的composition API相关回调函数中也都不可以


    //setup中的返回值是一个对象,内部的属性和方法是给html模板使用的

    //setup中的对象内部的属性和data函数中的return对象的属性都可以在html模板中使用

    //setup中的对象中的属性和data函数中的对象中的属性会合并为组件对象的属性

    //setup中的对象中的方法和methods对象中的方法会合并为组件对象的方法

    //vue3中尽量不要混合使用data和setup及methods和setup

    //setup不能是一个async函数:因为返回值不再是return的对象,而是promise,模板看不到return对象中的属性数据


  setup(){

     console.log('setup')

    const num = ref(0)   //ref定义一个数据的响应式

    function changeNum(){

      num.value += 10

    }

    return {num,changeNum}

  },

    //数据初始化的生命周期回调

  beforeCreate(){

    console.log("beforeCreate: 初始化数据之前")

  },

 created(){

   console.log("created: 数据初始化之后")

 },

 beforeMount(){

   console.log("beforeMount: 挂载渲染之前")

 },

    //界面渲染完毕

 mounted(){

   console.log("mounted: 挂载渲染之后")

 }


}

</script>
展示结果
2.vue3合成API详解 --reactive
<template>
<div>
<h1 @click="changeEvent">计数: {{count}}</h1>
<h1 @click="changeNum">计数: {{num}}</h1>
<h1>用户名: {{user.username}}</h1>
<h1>特点: {{user.type}}</h1>
<h1>用户名: {{username}}</h1>
<h1>特点: {{type}}</h1>
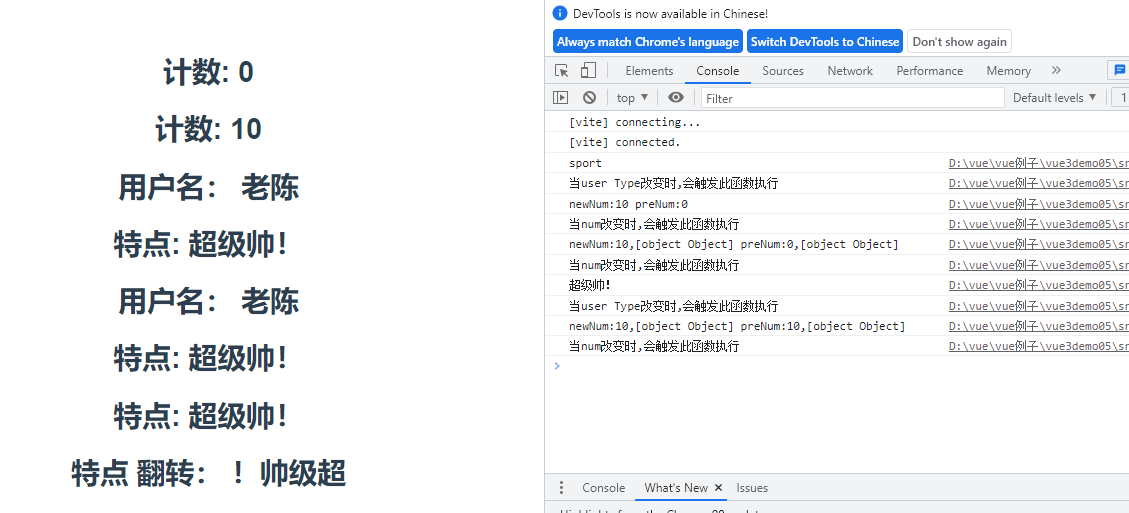
<h1 @click="changeType">特点: {{type}}</h1>
<h1>特点 翻转: {{reverseType}}</h1>
</div>
</template>
<script>
import {ref,reactive,toRefs,computed,watchEffect,watch} from 'vue'
export default {
name: 'App',
data(){
//console.log('data')
return{
count:0
}
},
methods:{
changeEvent:function(){
this.count++;
}
},
setup(){
// console.log('setup')
const num = ref(0) //ref定义一个数据的响应式
//reactive 作用: 定义多个数据的响应式
const user= reactive({
username:"老陈",
age:27,
type:'sport',
reverseType:computed(()=>{
return user.type.split('').reverse().join('');
})
})
function changeNum(){
num.value += 10
}
//vue2中的写法
function changeType(){
user.type = "超级帅!"
}
//vue3中的写法
const changeType = ()=>{
user.type="非常帅!!!"
}
watchEffect(()=>{
console.log(user.type)
console.log("当user Type改变时,会触发此函数执行")
})
//单独监听
watch(num,(newNum,preNum)=>{
console.log("newNum:"+newNum,"preNum:"+preNum)
console.log("当num改变时,会触发此函数执行")
})
//多个 监听
watch([num,user],(newNum,preNum)=>{
console.log("newNum:"+newNum,"preNum:"+preNum)
console.log("当num改变时,会触发此函数执行")
})
// ...toRefs(user) :是为了调用username时省去user.的
return {num,changeNum,user,...toRefs(user),changeType}
}
}
</script> 展示结果:
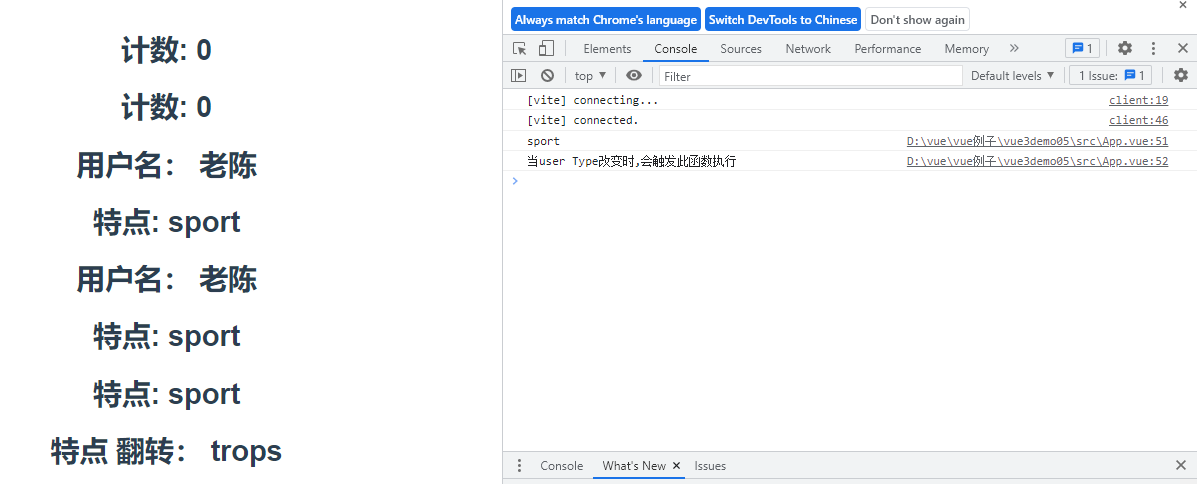
点击后
3.setup()中使用生命周期函数
 <!--App.vue-->

<template>

 <div>

   <!-- <h1>用户名:{{username}}</h1> -->

<User :username1="username"  :age="age"  msg2="小米"  />


</div>

</template>


<script>

import {reactive,toRefs} from 'vue'

import User from './components/User.vue'

export default {

  name: 'App',

  data(){

    return{


    }

  },

  components:{

    User

  },

  setup(){

     const user= reactive({

      username:"老陈",

      age:27,

      type:'sport',


    })


    return {user,...toRefs(user)}

  }


}

</script>
<!--User.vue-->
<template>
<div>
<h1>username:{{username1}}</h1>
<h1>age:{{age}}</h1>
<h1>description:{{description}}</h1>
</div>
</template>
<script>
import {ref,onBeforeMount,onMounted,onBeforeUpdate,onUpdated,onBeforeUnmount,onUnmounted} from 'vue'
export default {
setup(props,content){
//props参数,是一个对象,里面有父级组件向子级组件传递的数据,并且是在子级组件中使用props接收到的所有的属性 , 包含props配置声明且传入了的所有属性的对象
//content参数是一个对象,里面有attrs对象(后去当前组件标签上的所有的属性的对象,但是该属性是在props中没有声明接收的所有的尚需要的对象),emit方法(分发事件的),slots对象(插槽)
//attrs:包含没有在props配置中声明的属性的对象,相当于 this.$attrs
//slots:包含所有掺入的插槽内容的对象,相当于this.$slots
//emit:用来分发自定义事件的函数,相当于this.$emit
//可以写成 setup(props,{attrs,slots,emit})
console.log(props)
console.log(content)
console.log(content.attrs)
console.log(content.emit)
console.log(content.attes.msg2)
const description = ref(props.username1+"年龄是"+props.age)
onBeforeMount(()=>{
console.log('onBeforeMount')
})
onBeforeMount(()=>{
console.log('onBeforeMount')
})
return {description}
},
props:['username1','age']
}
</script> 展示结果:

4.reactive和ref的细节问题
 <template>

  <div class="about">

    <h1>reactive和ref的细节问题</h1>

    <h1>m1:{{m1}}</h1>

    <h1>m2:{{m2}}</h1>

    <h1>m3:{{m3}}</h1>

    <button @click="update">更新数据</button>

  </div>

</template>


<script>

import {ref,reactive} from 'vue'


export default {


  //是vue3的 composition API中2个最重要的响应式API (reactive和ref)

  //ref用来处理基本类型数据,reactive用来处理对象(递归深度响应式)

  //如果用ref对象/数组,内部会自动将对象/数组转换为reactive的代理对象

  //ref内部:通过给value属性添加getter/setter来实现对数据的劫持

  //reactive内部:通过使用proxy来实现对对象内部所有数据的劫持,并通过reflect操作对象内部数据

  //ref的数据操作:在js中要 .value,在模板中不需要(内部解析模板时会自动添加 .value)


  setup(props,content) {

    console.log(props);

    console.log(content);


     const m1 = ref('小明')

     const m2 = reactive({

       name:"liming",

       user:{

         name:'张三',

         age:20

       }

     })

     //ref的方式也可以传入对象

      const m3 = ref({

        name:"liming",

       user:{

         name:'张三',

         age:20

       }

     })


     function update(){

       //ref中如果放入是一个对象,那么是经过了reactive的处理, 形成一个Proxy类型的对象

       m1.value += "==="

       console.log(m1);

       m2.user.name="lisi"

       m3.value.user.age += "==="

       console.log(m3);

     }


    return{m1,m2,m3,update}


  }


}

</script> 
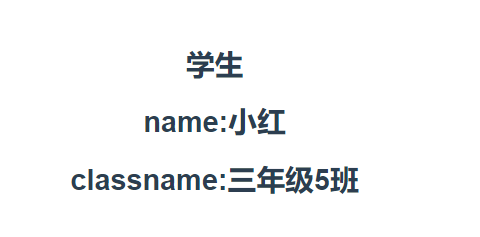
14.Provive和inject
 <!--App.vue-->


<template>

 <div>

	<Student />

</div>

</template>


<script>

import {reactive,toRefs,provide} from 'vue'

import Student from './components/Student.vue'

export default {

  name: 'App',

  components:{

    Student

  },

  setup(){


    const student=reactive({

      name:"小红",

      classname:'三年级5班'

    })

    provide('student',student)


  }


}

</script>
<!--Student.vue-->
<template>
<div>
<h1>学生</h1>
<h1>name:{{name}}</h1>
<h1>classname:{{classname}}</h1>
</div>
</template>
<script>
import {ref,inject} from 'vue'
export default {
setup(){
const student=inject('student')
return {...student}
}
}
</script> 展示结果
15.路由
1.vue3路由的基本使用
 <!--App.vue-->

<template>

  <div>

    <h1>Hello App!</h1>

  <p>

    <!-- use the router-link component for navigation. -->

    <!-- specify the link by passing the `to` prop. -->

    <!-- `<router-link>` will render an `<a>` tag with the correct `href` attribute -->

    <router-link to="/">Go to Home</router-link>

    <router-link to="/about">Go to About</router-link>

  </p>

  <!-- route outlet -->

  <!-- component matched by the route will render here -->

  <router-view></router-view>

  </div>

</template>


<script>

import HelloWorld from './components/HelloWorld.vue'


export default {

  name: 'App',

  components: {

    HelloWorld

  }

}

</script>
<!--router/index.js-->
// 导入进来
// import VueRouter from 'vue-router'
import {createRouter,createWebHashHistory} from 'vue-router'
// 1. Define route components.
// These can be imported from other files
const Home = { template: '<div>Home</div>' }
const About = { template: '<div>About</div>' }
// 2. Define some routes
// Each route should map to a component.
// We'll talk about nested routes later.
const routes = [
{ path: '/', component: Home },
{ path: '/about', component: About },
]
// 3. Create the router instance and pass the `routes` option
// You can pass in additional options here, but let's
// keep it simple for now.
const router = createRouter({
// 4. Provide the history implementation to use. We are using the hash history for simplicity here.
history: createWebHashHistory(),
routes, // short for `routes: routes`
})
//导出路由
export default router <!--main.js-->
import { createApp } from 'vue'
import router from '../router'
import App from './App.vue'
import './index.css'
const app = createApp(App)
//使用路由
app.use(router)
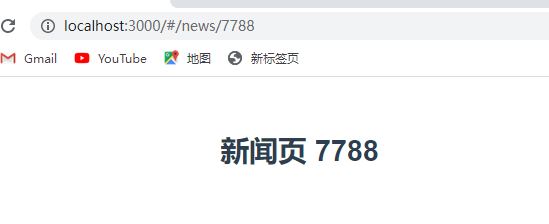
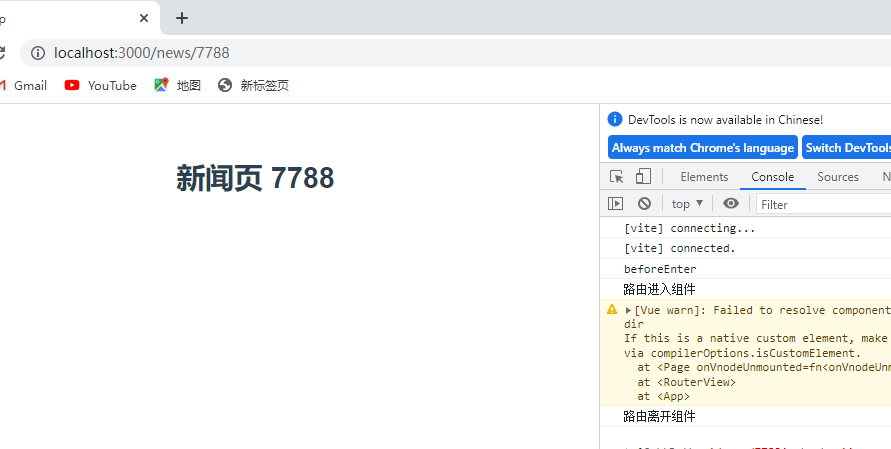
app.mount('#app') 2.动态路由和404NotFound
 <!--App.vue-->

<template>

  <div>

    <!-- <h1>Hello App!</h1> -->


    <!-- use the router-link component for navigation. -->

    <!-- specify the link by passing the `to` prop. -->

    <!-- `<router-link>` will render an `<a>` tag with the correct `href` attribute -->

  <!-- <p>

    <router-link to="/">Go to Home</router-link>

    <router-link to="/about">Go to About</router-link>

  </p> -->

  <!-- route outlet -->

  <!-- component matched by the route will render here -->

  <router-view></router-view>

  </div>

</template>


<script>

import HelloWorld from './components/HelloWorld.vue'


export default {

  name: 'App',

  components: {

    HelloWorld

  }

}

</script>
<!--News.vue-->
<template>
<div>
<h1>新闻页 {{$route.params.id}}</h1>
</div>
</template>
<script>
export default {
mounted(){
console.log(this.$route)
}
}
</script>
<!--Home.vue-->
<template>
<h1>这是首页</h1>
</template>
<!--NotFound.vue-->
<template>
<h1>404,找不到页面</h1>
</template> <!--router/index.js-->
// 导入进来
// import VueRouter from 'vue-router'
import {createRouter,createWebHashHistory} from 'vue-router'
import Home from '../src/components/Home.vue'
import News from '../src/components/News.vue'
import NotFound from '../src/components/NotFound.vue'
// 1. Define route components.
// These can be imported from other files
//const Home = { template: '<div>Home</div>' }
const About = { template: '<div>About</div>' }
// 2. Define some routes
// Each route should map to a component.
// We'll talk about nested routes later.
const routes = [
{ path: '/', component: Home },
{ path: '/about', component: About },
{
path:'/news/:id',
component:News
},
{
path:'/:path(.*)',
component:NotFound
}
]
// 3. Create the router instance and pass the `routes` option
// You can pass in additional options here, but let's
// keep it simple for now.
const router = createRouter({
// 4. Provide the history implementation to use. We are using the hash history for simplicity here.
history: createWebHashHistory(),
routes, // short for `routes: routes`
})
//导出路由
export default router 3.路由正则与重复参数
/route/index.js
// 导入进来
// import VueRouter from 'vue-router'
import {createRouter,createWebHashHistory} from 'vue-router'
import Home from '../src/components/Home.vue'
import News from '../src/components/News.vue'
import NotFound from '../src/components/NotFound.vue'
import Article from '../src/components/Article.vue'
import Films from '../src/components/Films.vue'
// 1. Define route components.
// These can be imported from other files
//const Home = { template: '<div>Home</div>' }
const About = { template: '<div>About</div>' }
// 2. Define some routes
// Each route should map to a component.
// We'll talk about nested routes later.
const routes = [
{ path: '/', component: Home },
{ path: '/about', component: About },
{
path:'/news/:id',
component:News
},
{
path:'/:path(.*)',
component:NotFound
},
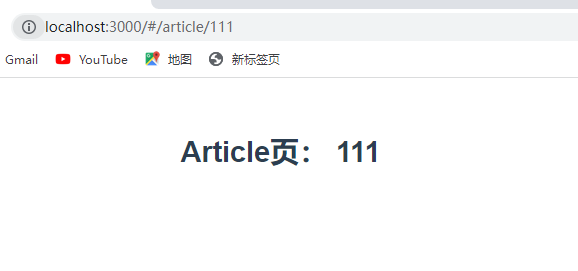
{
path:'/article/:id(\\d+)',
component:Article
},
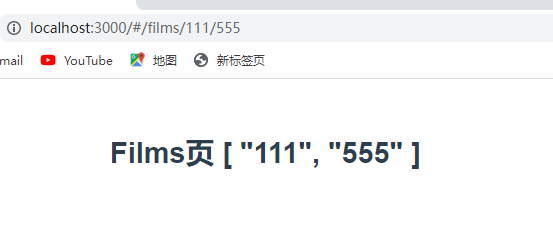
{
// id+ 是至少会有1个参数 例: /films/111/555
// id* 是可有可没有,也可以有任意多个 例:/films/ 或/films/111/555
// id? 是有,或者没有 ,不可以重复 例:/films/ 或/films/111
path:'/films/:id',
component:Films
}
]
// 3. Create the router instance and pass the `routes` option
// You can pass in additional options here, but let's
// keep it simple for now.
const router = createRouter({
// 4. Provide the history implementation to use. We are using the hash history for simplicity here.
history: createWebHashHistory(),
routes, // short for `routes: routes`
})
//导出路由
export default router Films.vue
 <template>

    <div>

        <h1>Films页 {{$route.params.id}}</h1>


    </div>

</template>

<script>

export default {

    mounted(){

        console.log(this.$route)

    }

}

</script>
Article.vue
 <template>

    <div>

        <h1>Article页: {{$route.params.id}}</h1>


    </div>

</template>

<script>

export default {

    mounted(){

        console.log(this.$route)

    }

}

</script>
展示结果
4.路由嵌套
/route/index.js
 // 导入进来

// import VueRouter from 'vue-router'

import {createRouter,createWebHashHistory, useRoute} from 'vue-router'


import Home from '../src/components/Home.vue'

import News from '../src/components/News.vue'

import NotFound from '../src/components/NotFound.vue'

import Article from '../src/components/Article.vue'

import Films from '../src/components/Films.vue'

import User from '../src/components/User.vue'

import Hengban from '../src/components/Hengban.vue'

import Shuban from '../src/components/Shuban.vue'


// 1. Define route components.

// These can be imported from other files

//const Home = { template: '<div>Home</div>' }

const About = { template: '<div>About</div>' }


// 2. Define some routes

// Each route should map to a component.

// We'll talk about nested routes later.

const routes = [

  { path: '/', component: Home },

  { path: '/about', component: About },

  {

      path:'/news/:id',

      component:News

  },

  {

      path:'/:path(.*)',

      component:NotFound

  },

  {

      path:'/article/:id(\\d+)',

      component:Article

  },

  {

    // id+ 是至少会有1个参数  例: /films/111/555

    // id* 是可有可没有,也可以有任意多个  例:/films/ 或/films/111/555

    // id? 是有,或者没有  ,不可以重复   例:/films/  或/films/111

      path:'/films/:id+',

      component:Films

  },

  {

    // /user/:id  这样写的话 路径为 /user/11/hengban

    // /user  这样写的话 路径为 /user/hengban

    path:'/user/:id',

    component:User,

    children:[

      {

        path:'hengban',

        component:Hengban

      },

      {

        path:'shuban',

        component:Shuban

      }

    ]

  }

]


// 3. Create the router instance and pass the `routes` option

// You can pass in additional options here, but let's

// keep it simple for now.

const router = createRouter({

  // 4. Provide the history implementation to use. We are using the hash history for simplicity here.

  history: createWebHashHistory(),

  routes, // short for `routes: routes`

})


//导出路由

export default router
User.vue 、 Hengban.vue 、 Shuban.vue
<!--User.vue-->
<template>
<div>
<h1>{{$route.params.id}}:user页面</h1>
<router-view></router-view>
</div>
</template>
<!--Hengban.vue-->
<template>
<h1>这是横版页面</h1>
</template>
<!--Shuban.vue-->
<template>
<h1>这是竖版页面</h1>
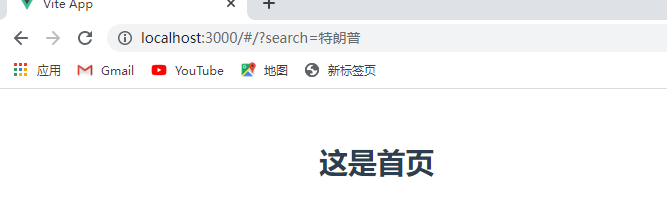
</template> 5.使用js跳转页面
page.vue
 <template>

    <dir>

        <h1>这是page页面,学习编程导航</h1>

        <button @click="goPage">跳转页面</button>

    </dir>

</template>

<script>

export default {

    methods:{

        goPage(){

        console.log("跳转到首页")

       // this.$router.push("/")  //跳转到首页

      //  this.$router.push({path:'/news/111'})  //跳转到/news/111页面

        //携带参数跳转

       // this.$router.push({name:"news",params:{id:7788}})

       this.$router.push({path:"/",query:{search:'特朗普'}})


        }

    }

}

</script>
index.js
 // 导入进来

// import VueRouter from 'vue-router'

import {createRouter,createWebHashHistory, useRoute} from 'vue-router'


import Home from '../src/components/Home.vue'

import News from '../src/components/News.vue'

import NotFound from '../src/components/NotFound.vue'

import Article from '../src/components/Article.vue'

import Films from '../src/components/Films.vue'

import User from '../src/components/User.vue'

import Hengban from '../src/components/Hengban.vue'

import Shuban from '../src/components/Shuban.vue'

import Page from '../src/components/Page.vue'


// 1. Define route components.

// These can be imported from other files

//const Home = { template: '<div>Home</div>' }

const About = { template: '<div>About</div>' }


// 2. Define some routes

// Each route should map to a component.

// We'll talk about nested routes later.

const routes = [

  { path: '/', component: Home },

  { path: '/about', component: About },

  {

      name:"news",

      path:'/news/:id',

      component:News

  },

  {

      path:'/:path(.*)',

      component:NotFound

  } ,

  {

    path:'/page',

    component:Page

  }

]


// 3. Create the router instance and pass the `routes` option

// You can pass in additional options here, but let's

// keep it simple for now.

const router = createRouter({

  // 4. Provide the history implementation to use. We are using the hash history for simplicity here.

  history: createWebHashHistory(),

  routes, // short for `routes: routes`

})


//导出路由

export default router
News.vue
 <template>

    <div>

        <h1>新闻页 {{$route.params.id}}</h1>


    </div>

</template>

<script>

export default {

    mounted(){

        console.log(this.$route)

    }

}

</script>
展示结果:
6.命名路由与重定向和别名
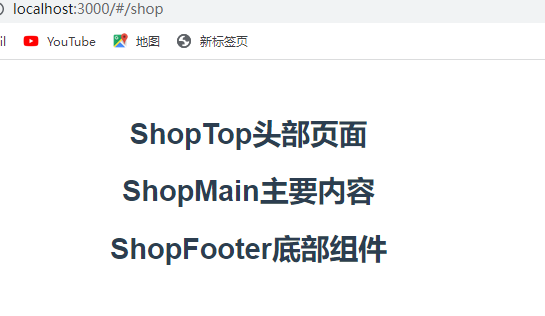
1.命名视图
 <router-view name="ShopTop"></router-view>

  <router-view></router-view>

  <router-view name="ShopFooter"></router-view>
import ShopMain from '../src/components/ShopMain.vue'
import ShopTop from '../src/components/ShopTop.vue'
import ShopFooter from '../src/components/ShopFooter.vue'
const routes = [
{
path:'/shop',
components:{
default:ShopMain,
ShopTop:ShopTop,
ShopFooter:ShopFooter
}
}
] 展示结果
2.重定向
{
path:'/mail',
redirect:(to)=>{return {path:'/shop'}}
// redirect:"/shop"
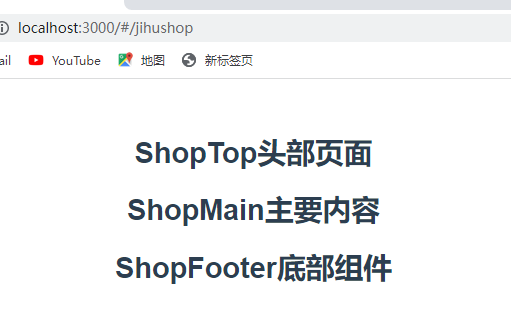
} 3.取别名
 {

    path:'/shop',

    alias:"/jihushop",

   //alias:["/q11","/222"],

    components:{

      default:ShopMain,

      ShopTop:ShopTop,

      ShopFooter:ShopFooter

    }

} 
4.replace 使用
replace : 使覆盖原来的页面,让其不能往回退
page.vue
<template>
<dir>
<h1>这是page页面,学习编程导航</h1>
<button @click="goPage">跳转页面</button>
<button @click="replacePage">替换页面</button>
<button @click="$router.go(1)">前进</button> //前进
<button @click="$router.go(-1)">后退</button> //后退
</dir>
</template>
<script>
export default {
methods:{
goPage(){
console.log("跳转到首页")
// this.$router.push("/") //跳转到首页
// this.$router.push({path:'/news/111'}) //跳转到/news/111页面
//携带参数跳转
this.$router.push({name:"news",params:{id:7788}})
// this.$router.push({path:"/",query:{search:'特朗普'}})
},
replacePage(){
this.$router.replace({name:"news",params:{id:7788}})
}
}
}
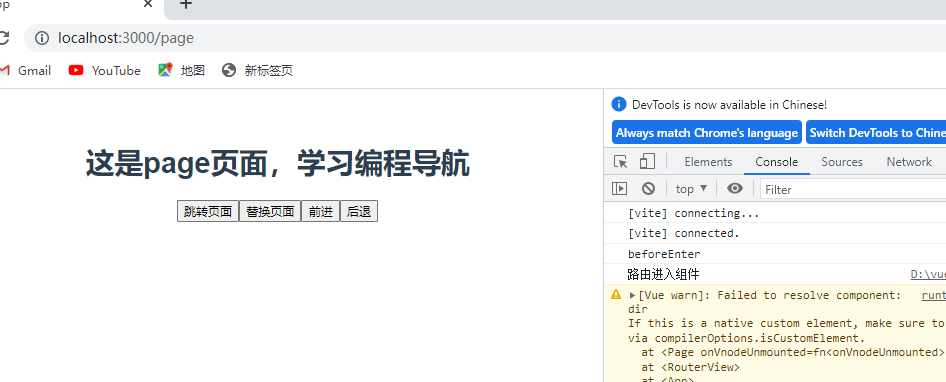
</script> 5.路由模式与路由守卫
 路由守卫就是  和权限差不多  没有权限进不去该页面

{

    path:'/page',

    component:Page,

    beforeEnter:(to,from)=>{

      console.log('beforeEnter')

    }

  },

  router.beforeEach((to, from,next) => {

    // ...

    // explicitly return false to cancel the navigation

    console.log(to)

    next()

    //return false

  })
page.vue
 <script>

export default {

    methods:{

        goPage(){

        console.log("跳转到首页")

       // this.$router.push("/")  //跳转到首页

      //  this.$router.push({path:'/news/111'})  //跳转到/news/111页面

        //携带参数跳转

       this.$router.push({name:"news",params:{id:7788}})

      // this.$router.push({path:"/",query:{search:'特朗普'}})


        },

        replacePage(){

            this.$router.replace({name:"news",params:{id:7788}})

        }


    },

    beforeRouteEnter(){

        console.log('路由进入组件')

    },

     beforeRouteUpdate(){

        console.log('路由更新组件')

    },

     beforeRouteLeave(){

        console.log('路由离开组件')

    }

}

</script>
展示结果
16.vue3中如何设置状态管理
App.vue
 <template>

  <img alt="Vue logo" src="./assets/logo.png" />

  <HelloWorld msg="Hello Vue 3.0 + Vite" />

</template>


<script>

import HelloWorld from './components/HelloWorld.vue'


import store from './store/index.js'


// import {reactive} from 'vue'


// const store={

//   state:reactive({

//     message:"helloworld"

//   }),

//   setMessage(value){

//     this.state.message = value;

//   }

// }


export default {

  name: 'App',

  components: {

    HelloWorld

  },

  provide:{

    store

  }

}

</script>
Helloworld.vue
 <template>

<div>

  <h1>{{ store.state.message }}</h1>

  <button @click="store.setMessage('老陈真帅!')">count is: {{ count }}</button>

</div>

</template>


<script>

export default {

  name: 'HelloWorld',

  props: {

    msg: String

  },

  data() {

    return {

      count: 0

    }

  },

  inject:['store']

}

</script>
store/index.js
import {reactive} from 'vue'
const store={
state:reactive({
message:"helloworld"
}),
setMessage(value){
this.state.message = value;
}
}
//导出默认值
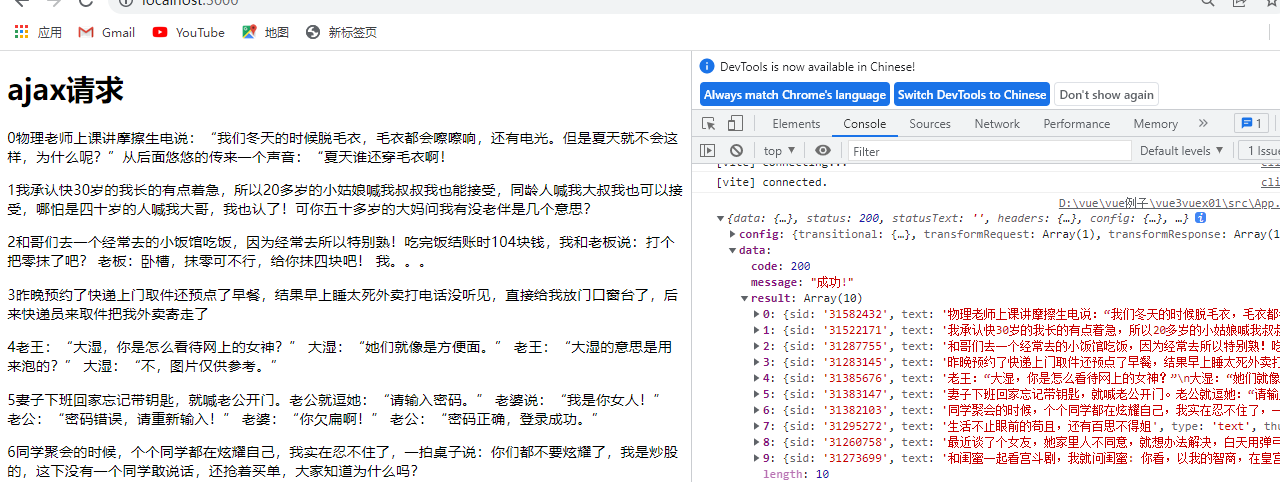
export default store; 17.vue3中如何使用axios实现前后端交互
使用axios实现前后端交互时需要先安装axios:
npm install axios --save
App.vue
 <template>

  <div>

    <h1>ajax请求</h1>

    <div v-for="(item,i) in store.state.duanziList" :key="i">

      <p>{{i}}{{item.text}}</p>

    </div>

  </div>

</template>


<script>

// import HelloWorld from './components/HelloWorld.vue'


import store from './store/index.js'

import axios from 'axios'


export default {

  name: 'App',

  provide:{

    store

  },

  setup(){

    //方法一

    var api = "https://api.apiopen.top/getJoke?page=1&count=10&type=text"

    // fetch(api).then(res=>res.json()).then(result=>{

    //   store.setDzList(result.result)

    //   console.log(result)

    // })


//方法二:

    axios.get(api).then((result)=>{

      console.log(result)

      store.setDzList(result.data.result)

    })

    return{ store }

  }

}

</script>
components/HelloWorld.vue
 <template>

<div>

  <h1>{{ store.state.message }}</h1>

  <button @click="store.setMessage('老陈真帅!')">count is: {{ count }}</button>

</div>

</template>


<script>

export default {

  name: 'HelloWorld',

  props: {

    msg: String

  },

  data() {

    return {

      count: 0

    }

  },

  inject:['store']

}

</script>
store/index.js
 import {reactive} from 'vue'


const store={

  state:reactive({

    message:"helloworld",

    duanziList:[]

  }),

  setMessage(value){

    this.state.message = value;

  },

  setDzList(list){

    this.state.duanziList = list

  }

}


//导出默认值

export default store;
展示结果
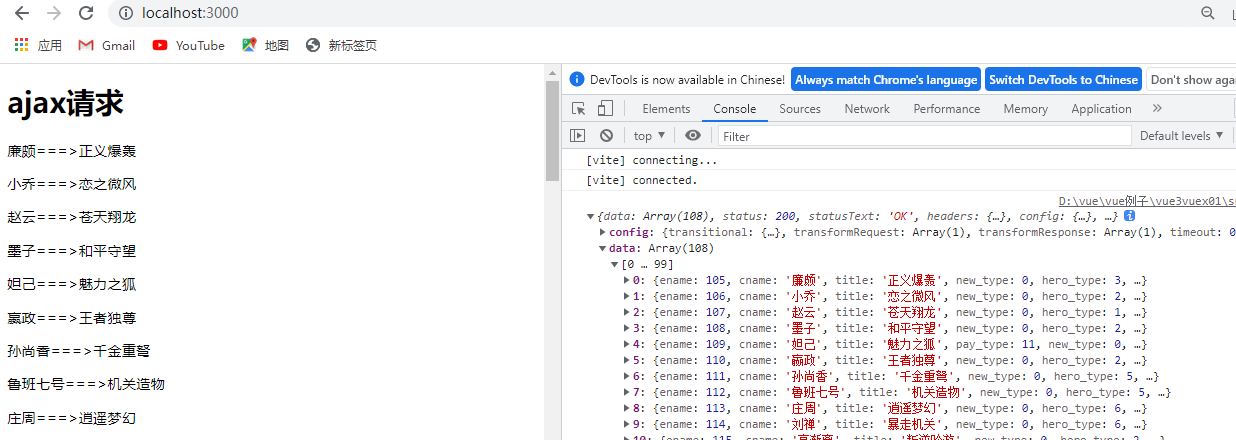
18.vite配置跨域请求
在项目的根目录下创建一个vite.config.js配置文件
vite.config.js
 module.exports = {


   proxy:{

         '/api':{

                target:'https://pvp.qq.com/',

                changeOrigin:true,//是否允许跨域

                rewrite:path => path.replace(/^\/api/, '')

         }

    }


}
App.vue
 <template>

  <div>

    <h1>ajax请求</h1>

    <div v-for="(item,i) in store.state.duanziList" :key="i">

      <p>{{item.cname}}===>{{item.title}}</p>

    </div>

  </div>

</template>


<script>

// import HelloWorld from './components/HelloWorld.vue'


import store from './store/index.js'

import axios from 'axios'


export default {

  name: 'App',

  provide:{

    store

  },

  setup(){


    var api = "/api/web201605/js/herolist.json"

    axios.get(api).then((result)=>{

      console.log(result)

      store.setDzList(result.data)

    })

    return{ store }

  }

}

</script>
store/index.js
 import {reactive} from 'vue'


const store={

  state:reactive({

    message:"helloworld",

    duanziList:[]

  }),

  setMessage(value){

    this.state.message = value;

  },

  setDzList(list){

    this.state.duanziList = list

  }

}


//导出默认值

export default store;
展示结果

19.mockjs模拟获取数据
mockjs 官网:http://mockjs.com/
 # 安装

npm install mockjs --save


// 使用 Mock

var Mock = require('mockjs')

var data = Mock.mock({

    // 属性 list 的值是一个数组,其中含有 1 到 10 个元素

    'list|1-10': [{

        // 属性 id 是一个自增数,起始值为 1,每次增 1

        'id|+1': 1

    }]

})


// 输出结果

console.log(JSON.stringify(data, null, 4))
例子
App.vue
 <template>

  <div>

    <h1>ajax请求</h1>

    <div v-for="(item,i) in store.state.duanziList" :key="i">

      <p>{{item.cname}}===>{{item.title}}</p>

    </div>


    <h1>{{store.state.message}}</h1>


  </div>

</template>


<script>

// import HelloWorld from './components/HelloWorld.vue'


import store from './store/index.js'

import axios from 'axios'


export default {

  name: 'App',

  provide:{

    store

  },

  setup(){

    let api = '/user/userinfo'

  //let api = '/user/userinfo?username=laoma$password=123456'


    axios.get(api).then((result)=>{

      console.log(result)

      store.setMessage(result.data.username+result.data.type)

    })


    axios.get('/account?username=laoma$password=123456').then((result)=>{

      console.log(result)


      })


    return{ store }

  }

}

</script>
/mock/index.js
 //导入mock

import Mock from 'mockjs'


//设置一下模拟返回数据的时间

Mock.setup({

    timeout:'200-600'

})


Mock.mock(

    //请求的路径

    "/user/userinfo",

    'get',

    (req)=>{

        console.log(req)

        return{

            username:"老马",

            type:'帅!'

        }

    }

)


Mock.mock(

    //请求的路径

    /\/account.*/,  //正则匹配  .* :匹配 account后面所有的

    'get',

    (req)=>{

        console.log(req)

        return{

           info:"登录成功"

        }

    }


)
main.js
import { createApp } from 'vue'

import App from './App.vue'

import './index.css'

import '.