【前端必会】走进webpack生命周期,另类的学习方法
背景
webpack构建过程中的hooks都有什么呢?除了在网上看一些文章,还可以通过更直接的办法,结合官方文档快速让你进入webpack的hook世界
写一个入口文件
 //index.js

const webpack = require("webpack");

const path = require("path");

const PrintHooksPlugin = require("./PrintHooksPlugin");

const config = {

  context: path.resolve(__dirname),

  mode: "production",

  optimization: {

    minimize: false,

  },

  entry: "./main.js",

  target: ["web", "es5"],

  output: {

    filename: "bundle.js",

    path: path.resolve(__dirname, "dist"),

  },

  plugins: [new PrintHooksPlugin()],

};


const compiler = webpack(config);

compiler.run((err, stats) => {

  debugger;

});
//看下打印插件
 //PrintHooksPlugin.js

class PrintHooksPlugin {

  constructor() {}

  //打印编译器Hooks

  printCompilerHooks(compiler) {

    //打印编译对象

    compiler.hooks.thisCompilation.tap("PrintHooksPlugin", (compilation) => {

      this.printCompilationHooks(compilation);

    });


    //遍历compiler hooks

    Object.keys(compiler.hooks).forEach((hookName) => {

      compiler.hooks[hookName].tap("PrintHooksPlugin", (arg) => {

        console.log(`${hookName}`, hookName, arg);

      });

    });

  }


  //打印编译(构建)Hooks

  printCompilationHooks(compilation) {

    let compilationHooks = compilation.hooks;


    //这里添加一个正则对象,判断Hook结尾的

    let reg = /Hook$/;

    Object.keys(compilationHooks).forEach((hookName) => {

      //获取hook函数名,判断以Hook结尾,并且不是log

      let name = compilationHooks[hookName].constructor.name;

      if (reg.test(name) && hookName !== "log") {

        compilationHooks[hookName].tap("PrintHooksPlugin", (arg) => {

          console.log(`compilation ${hookName}`, arg);

        });

      }

    });

  }


  //插件入口

  apply(compiler) {

    console.log(compiler);

    console.log(compiler.hooks.thisCompilation);

    this.printCompilerHooks(compiler);

  }

}

module.exports = PrintHooksPlugin;
//main.js
!(function () {
console.log('hello world');
})(); 结果
打印顺序就说明了生命周期的过程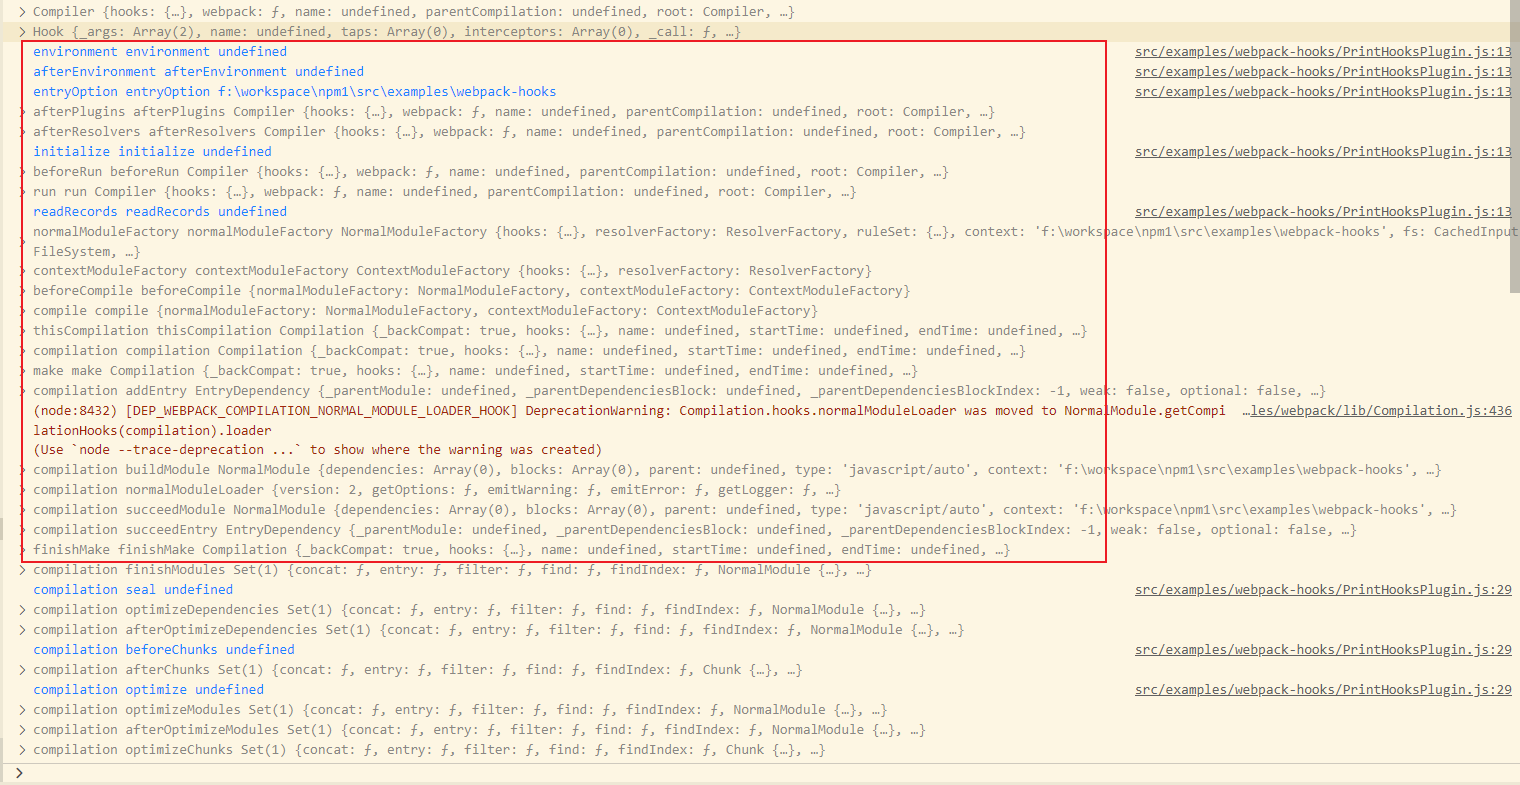
截图不全,看一下后面的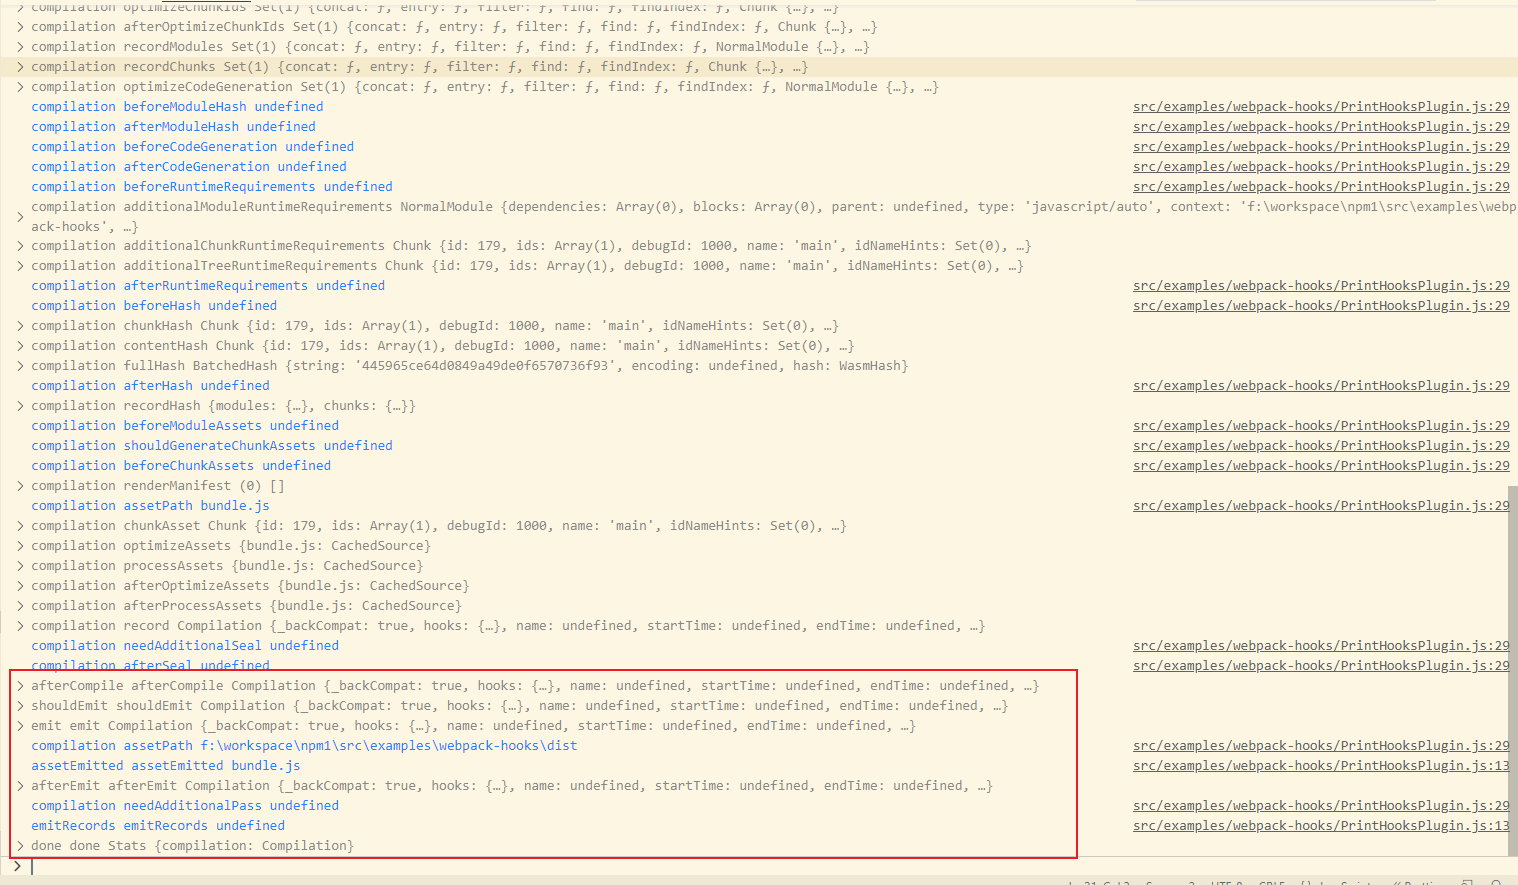
总结
- 换一种方法学习webpack的生命周期,那个hook在文档上看不太明白,直接断点,看看处理前后数据结构的变化。结合插件的源码。不信你不会
- 我们主要掌握方法,除了书本的知识,还要结合实践